

Installing Kubernetes Dashboard on Docker Desktop with Helm
A guide on how to use Helm to install the official Kubernetes Web UI application onto the local Kubernetes cluster managed by Docker Desktop


Kubernetes (k8s) is a powerful tool for managing and orchestrating distributed application services in a clustered environment.
However, interacting with k8s purely through the command line can become cumbersome. When you have many namespaces, services, pods, cron jobs, etc, it becomes difficult to see what is happening in your k8s cluster. There's come a point when you need something visual. I'm a big fan of k9s, an ASCII terminal GUI and often my go-to. But even this isn't enough all the time; there are times when I need graphs and tables to look at. This is where the official Kubernetes Dashboard comes in.
This guide will show you how to install the Kubernetes Dashboard v2.7.0 onto the k8s cluster that Docker Desktop installs.
Prerequisites
Docker Desktop v4.25.2
Kubernetes v1.28.2
Helm v3.13.2
Installation
Download the Helm repository for the Kubernetes Dashboard with this command:
# helm repo add [repo] [URL]
helm repo add kubernetes-dashboard https://kubernetes.github.io/dashboard/
Confirm the download by checking the Helm repositories on your machine with this command:
helm repo list
Check the charts in the Helm repository with this command:
helm search repo kubernetes-dashboard
Install the Helm chart:
# helm upgrade --install [release] [chart] --create-namespace --namespace [namespace] --set [key]=[value]
helm upgrade --install kubernetes-dashboard kubernetes-dashboard/kubernetes-dashboard --create-namespace --namespace kubernetes-dashboard --set extraArgs="{--enable-skip-login}" --set rbac.clusterReadOnlyRole=true --set metricsScraper.enabled=true --set metrics-server.enabled=true --set metrics-server.args="{--kubelet-insecure-tls}"
--set arguments sent to helm upgrade command allows applying some configuration to the underlying Helm chart. In this case, we're allowing us to skip the authentication for the dashboard, enabling the dashboard to access the entire cluster to be able to see all of the namespaces, services, pods, etc. and install the metrics scraper and server to be able to CPU and memory usage as charts. These arguments were figured out from reading the official docs for the Helm Chart.You now have two methods to access the dashboard.
The first method is to use kubectl proxy by running this command:
kubectl proxy
And accessing the dashboard using this URL:
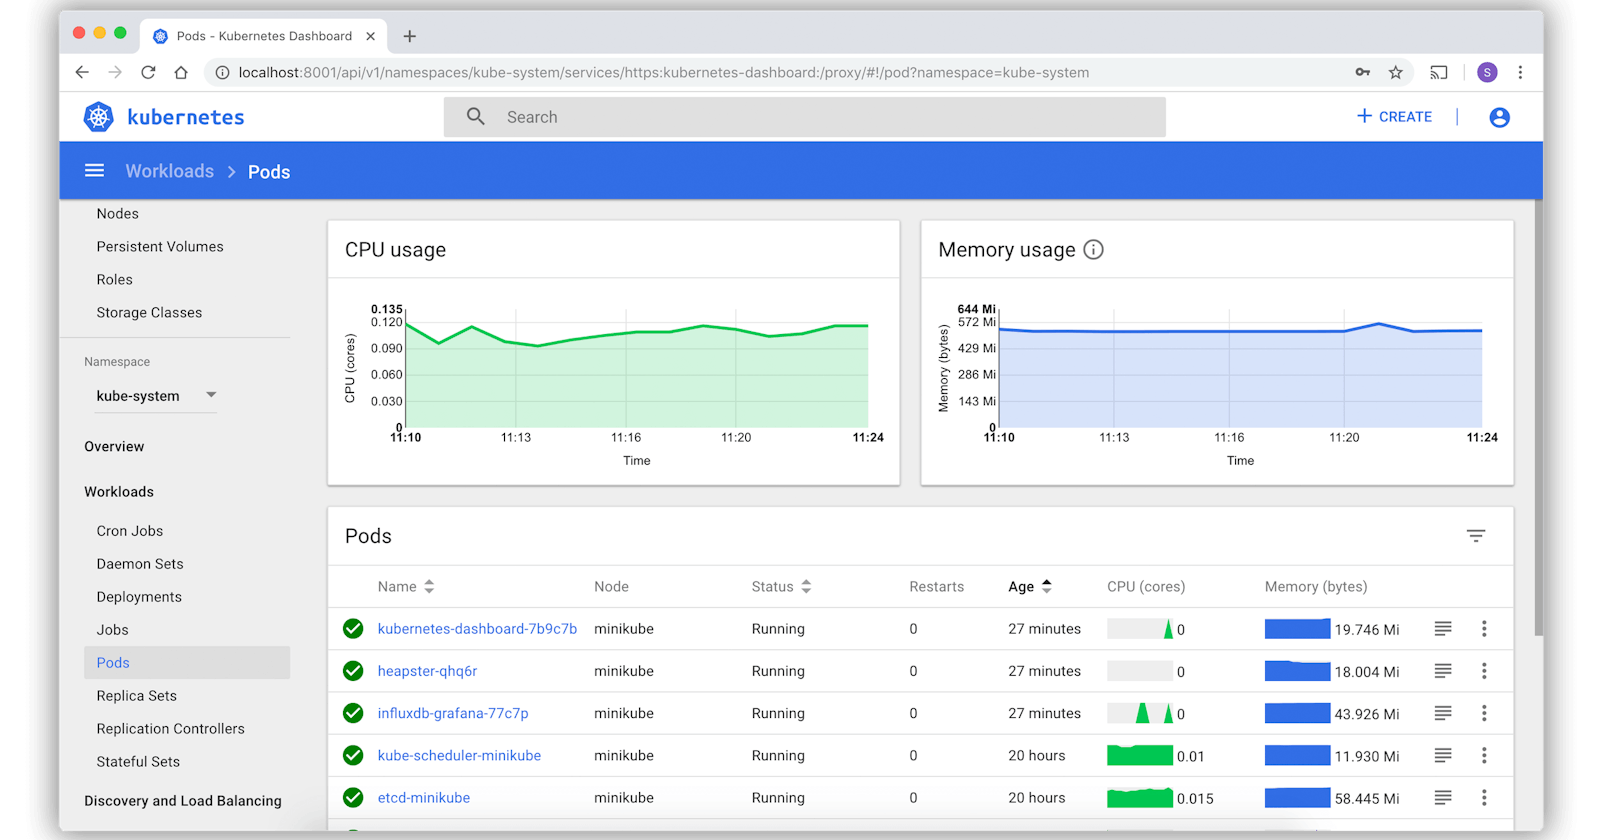
http://localhost:8001/api/v1/namespaces/kubernetes-dashboard/services/https:kubernetes-dashboard:https/proxy/#/workloads?namespace=_all
The second method is to use kubectl port-forward by running this command:
kubectl port-forward -n kubernetes-dashboard service/kubernetes-dashboard 8080:443
And accessing the dashboard using this URL:
https://localhost:8080/#/workloads?namespace=_all
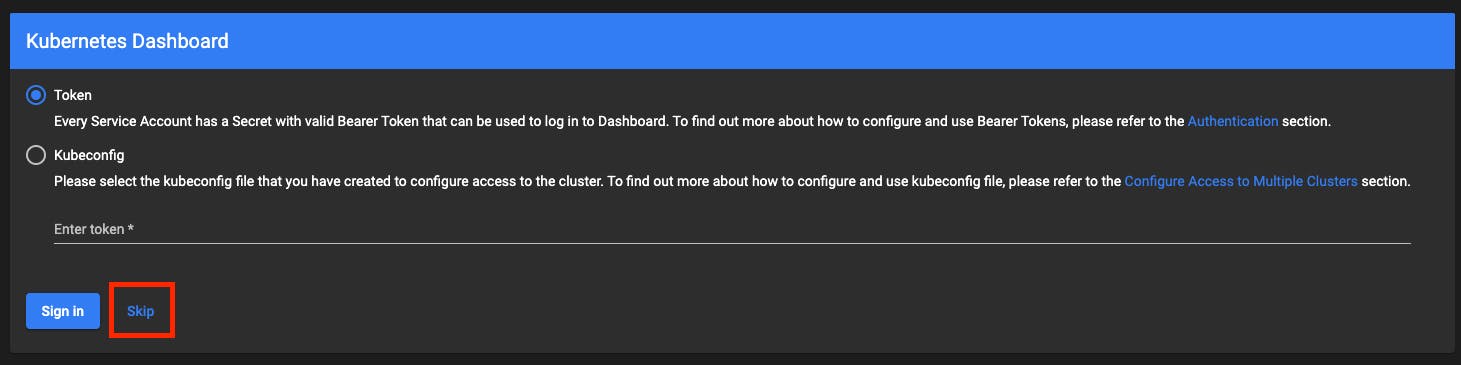
You will be asked to sign in when you have accessed the dashboard. Just click "Skip":
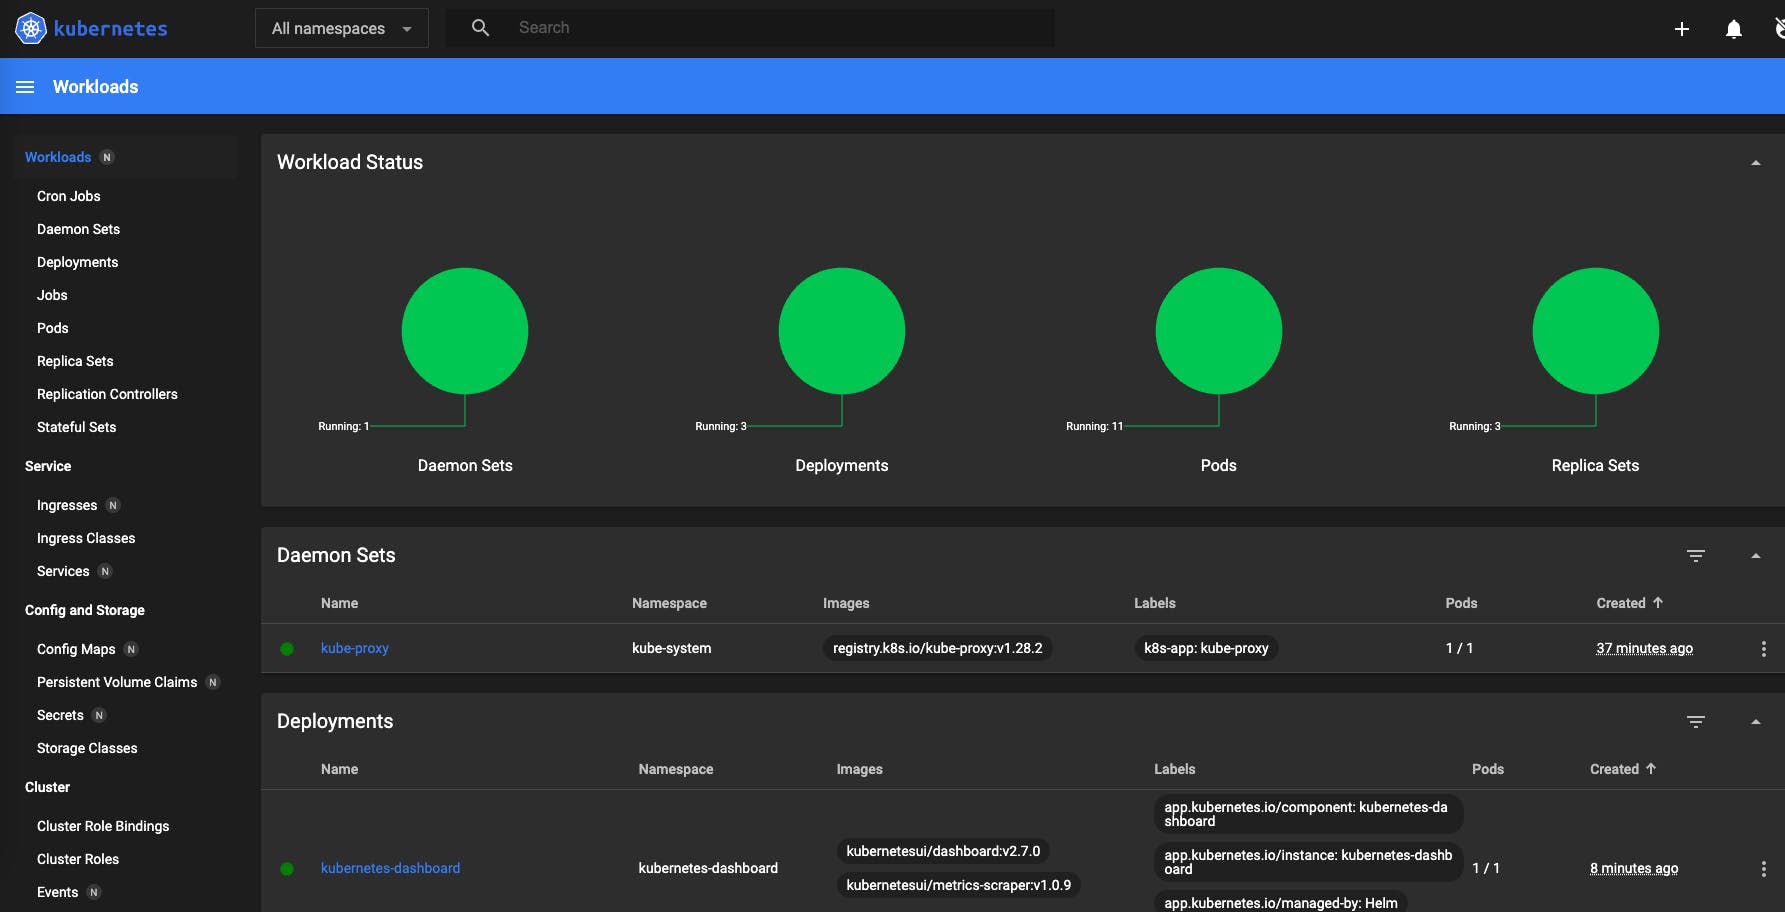
And then, you will see the dashboard 🚀
To delete the Helm release, run this command:
helm delete kubernetes-dashboard --namespace kubernetes-dashboard